¶ Overview
While vendors don't have access to our content management system, our platform has a dedicated section that lets customers/providers track and manage their sales via multiple vendors through a single, streamlined interface. The QR code checkout process adds to the convenience and enhances the overall experience for both vendors and customers.

The Vendors section allows users to manage their vendors. It includes the following actions:
- New: Users can add a new vendor by clicking on the "New" button. This allows them to enter the vendor's name, contact information, and other relevant details.
- Delete: Users can delete a vendor by selecting it and clicking on the "Delete" button. This will remove the vendor from the system.
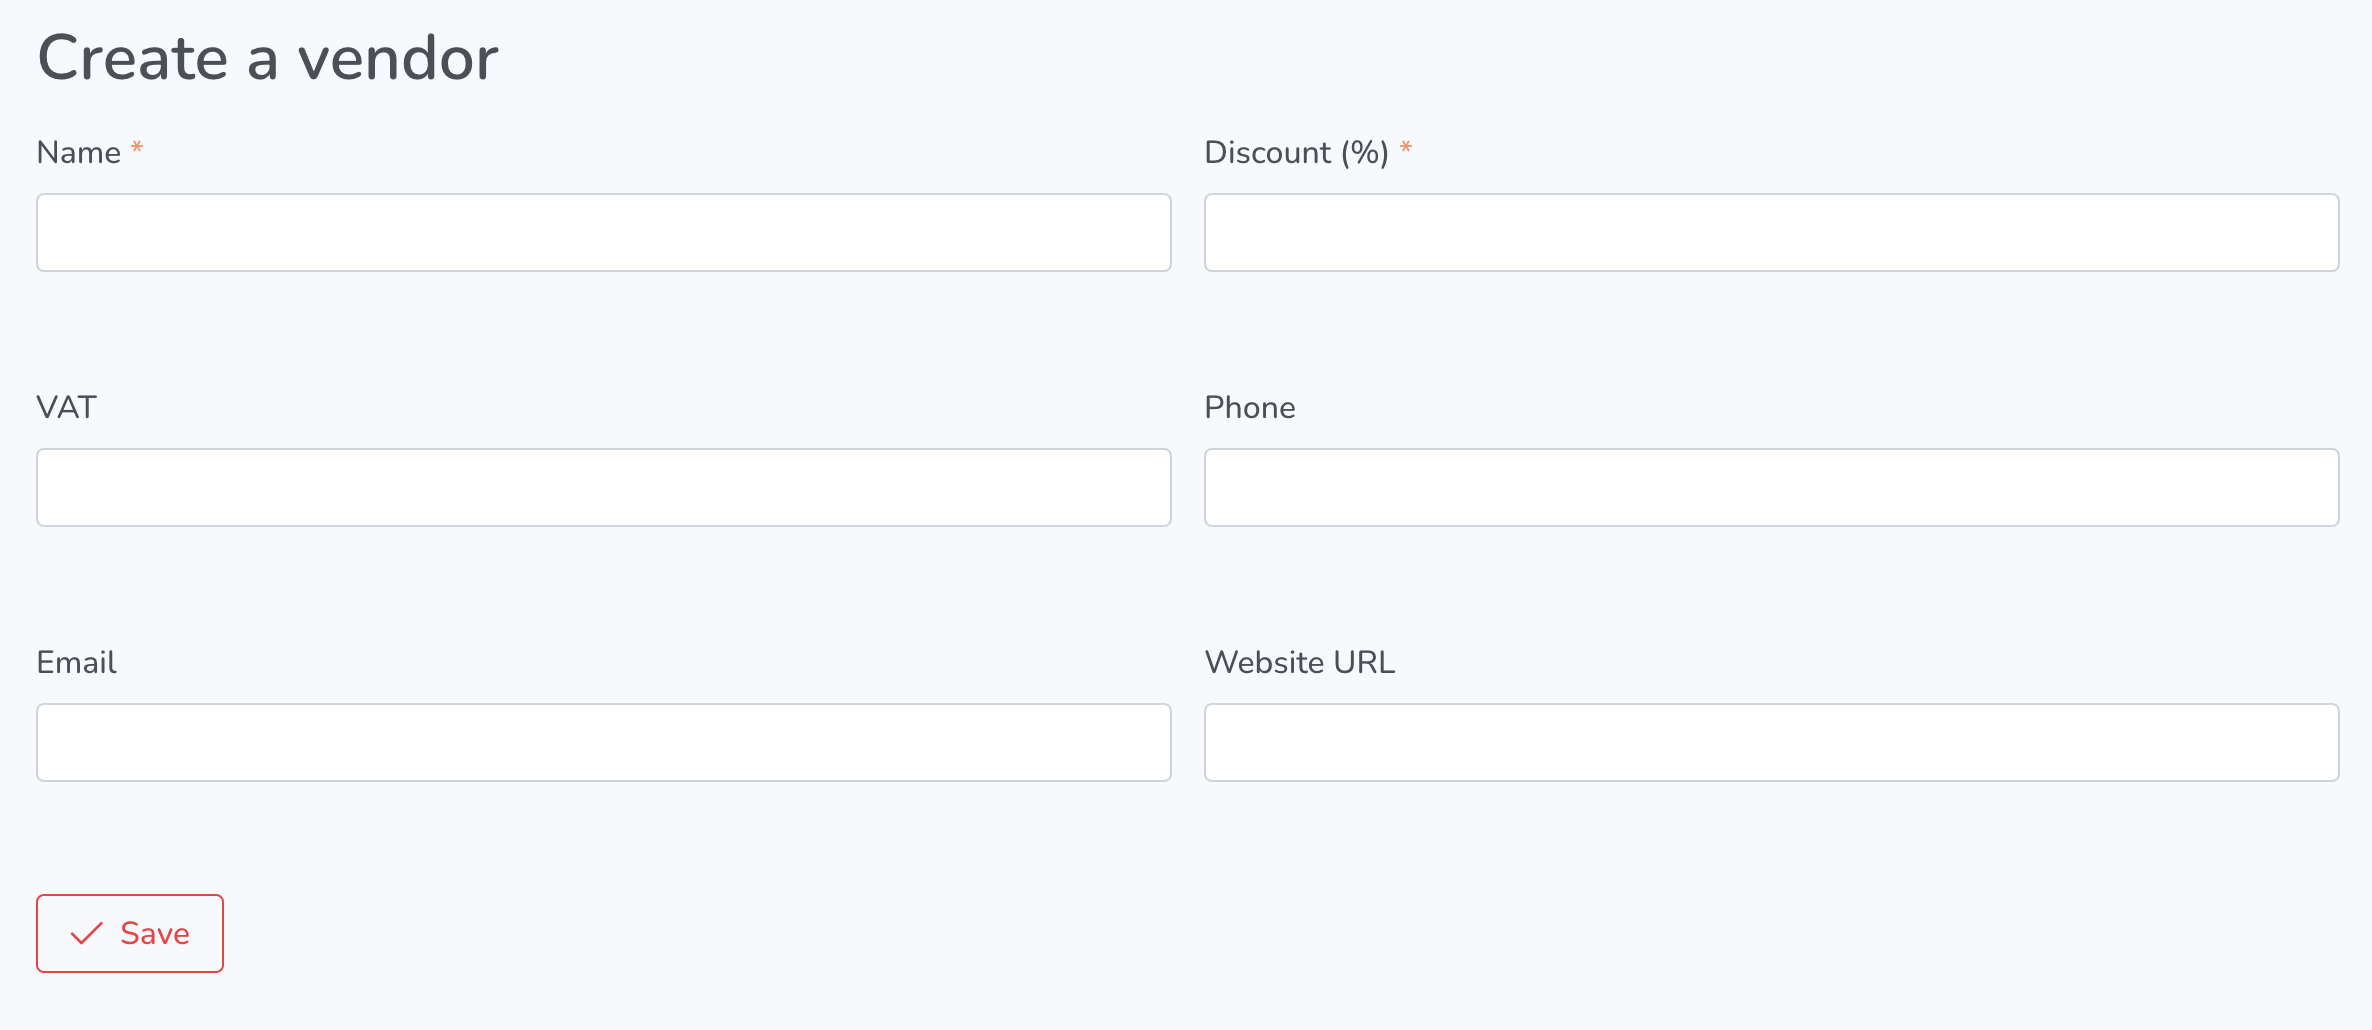
Create a vendor screen has the following action items:
- Name: Enter the name of the vendor.
- Discount (%): Enter the discount percentage to be applied to the vendor's products or services.
- VAT: Enter the vendor's VAT (Value Added Tax) information.
- Phone: Enter the vendor's phone number.
- Email: Enter the vendor's email address.
- Website URL: Enter the vendor's website URL.
- Save: Save the vendor information.

Basic Info: It should be noted that the Basic Info section is typically used to enter and update the vendor's contact and general information, such as their name, phone number, email address, and website URL. The Discount (%) field is used to specify the percentage of discount to be applied to the vendor's products or services, if applicable. The VAT field is used to specify the vendor's VAT (Value Added Tax) information, which is a tax that is added to the price of certain goods and services in some countries. The Save button is used to save any changes made to the vendor's information in this section.
Route Codes: This section allows users to assign specific codes to the vendor's routes, making it easier to keep track of which routes belong to which vendor. Users can create, edit, and delete route codes as needed.
Sales: This section displays information about the vendor's sales performance, such as the total revenue generated by their routes, the number of sales made, and any discounts or taxes applied to those sales. Users can also view sales data for individual routes or time periods, and generate reports based on that data. This section may also include tools for managing invoices, receipts, or other financial documents related to the vendor's sales.